Sample Kits
Upon receiving the package from Chronetyx, open it to find the sample kits. Each of these sample kits will include: 5 specimen bags, 5 barcoded sample tubes (with transfer straws), and 5 requisition forms

Collect Specimen
Collect specimen in urine cup (not provided)

Transfer Specimen
Transfer sample into the gray sample tubes by utilizing the transfer straw. This is done by placing the suction end of the straw into the cup and pushing the sample tube onto the needle end of the straw

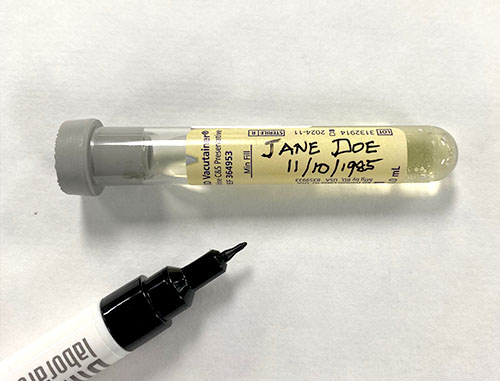
Patient Identifiers
Each specimen tube must have two unique patient identifiers. Hand write the name and date of birth on each tube.

Fill Out Paperwork
Fill out the requisition paperwork, which will include:
- Ordering Facility Information
- Patient Information
- Confirm Billing Information
- Specimen information
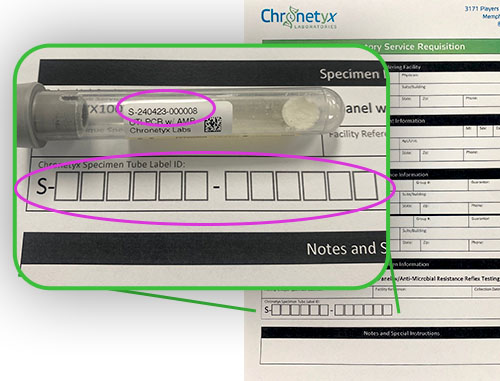
- Important: Be sure to write the number from the barcoded tube on the requisition

Put Specimen Tube into Specimen Bag
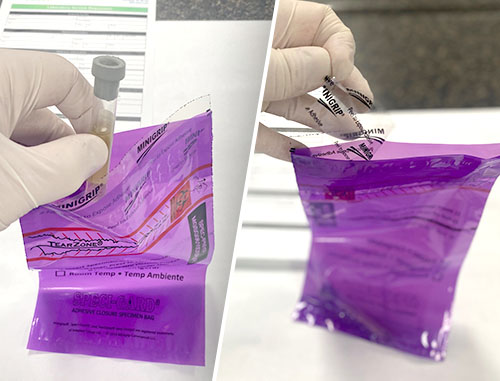
Open the specimen bag (purple bags), place tube into the specimen compartment, and seal the bag by peeling up the Minigrip (Clear plastic) seal at the top of the bag. Make sure the seal is fully closed.

Add Paperwork to Bag
Once paperwork is fully completed, place requisition paperwork into the paperwork pocket of the specimen bag.

Ship Specimen Bags
Place up to 5 specimen bags back into each preaddressed sample kit envelope, which will already have a return label attached.